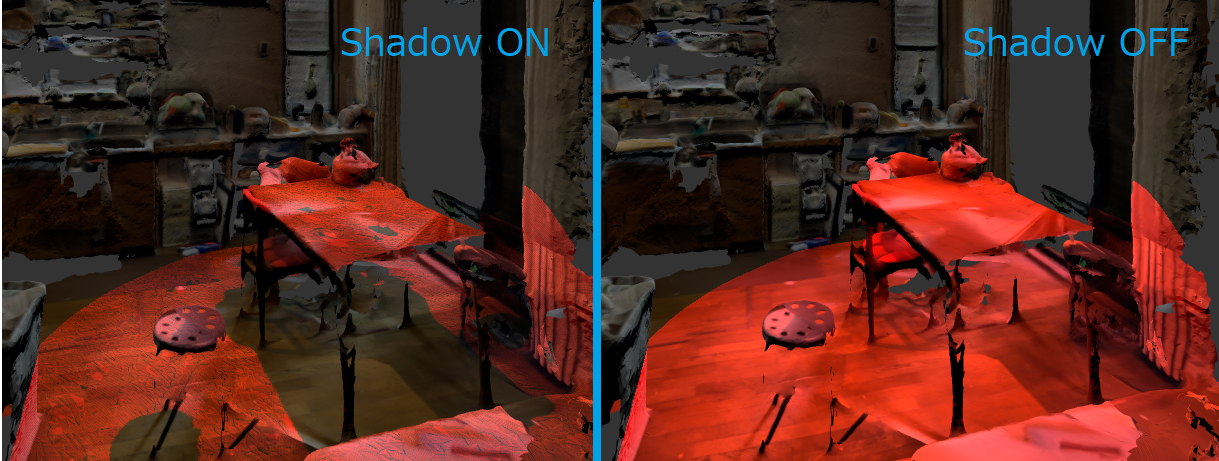
iPhone LIDARで家をスキャンしたら、真っ赤なスポットライトを設置するシミュレーションしたいじゃないですか。そんなときにA-Frameが便利なんですが、GLB(GLTF)でアップロードしてもshadowの設定が聞かずにShadow OFF状態になります。これだと、リアリティのかけらもないです。

A-Frameの設定すっとばしてgltfローダがmeshのmaterialまで一気に作ってくれるせいなので、コンポネートを貼り付けれてやって解決しました。shadow=の設定のかわりに以下を指定します。

そして、適当な場所で以下のスクリプトを実行します。以上。
This file contains hidden or bidirectional Unicode text that may be interpreted or compiled differently than what appears below. To review, open the file in an editor that reveals hidden Unicode characters.
Learn more about bidirectional Unicode characters
//for A-Frame | |
//使い方:<a-entity gltf-model="#glb" gltf_shadow ></a-entity> | |
// gltf でなければ shadow="receive: true;cast: true;" とするところ。 | |
// しかしgltfでは無視されるのでgltf_shadowをしていして、以下のコンポーネントを適用させる | |
// | |
AFRAME.registerComponent('gltf_shadow', { | |
init: function () { | |
this.enableShadow(); | |
this.el.addEventListener('object3dset', this.enableShadow.bind(this)); | |
}, | |
enableShadow: function () { | |
const mesh = this.el.getObject3D('mesh'); | |
if (!mesh) return; | |
mesh.traverse(function (node) { | |
console.log(node); | |
/*こちらは無くても表示上は問題ないが、内包されるメッシュと矛盾したくないのでセット*/ | |
if(node.type=="Group"){ | |
node.castShadow=true; | |
node.receiveShadow=true; | |
} | |
/*メッシュの設定でcast/recvして、再計算をしかける*/ | |
if(node.type=="Mesh"){ | |
node.castShadow=true; | |
node.receiveShadow=true; | |
//影も・テクスチャも表面のみ表示にする | |
node.material.shadowSide=THREE.FrontSide; | |
node.material.side=THREE.FrontSide; | |
node.material.needsUpdate=true; //(shadowの設定かえるだけならここは要らない, ついでに他のmaterial設定変えるなら) | |
node.geometry.computeVertexNormals();//影の計算にnormalの再計算が必要//デフォルトがshadowを使ってなかったので | |
} | |
}); | |
} | |
}); |
参考:実装例はこちらAFrame_gltf – Replit
ちなみに、OBJ形式で読み込めば問題ないですがobj/mtl/jpgの3ファイルが必要になってしまいます。そしてobjファイルはでかい。