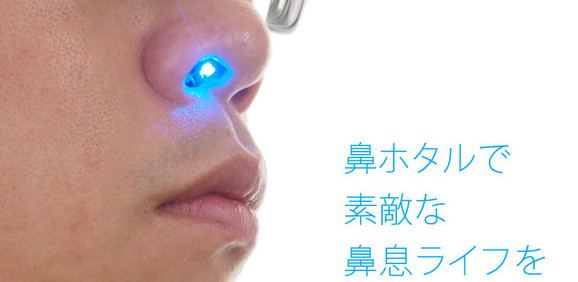
How to assemble nose led kit (Hanahotaru).
注意/CAUTION
本品は小さな電池を含むため、飲み込むと電流の作用により胃に穴があく等の深刻な影響を与える場合があります。お子様や本製品を知らない人の手に届かぬようお気を付け下さい。
This product contains a small battery, swallowing may cause serious effects such as a hole in the stomach due to the reaction of electric current. Please be careful not to reach children or people who do not know about this product.
本品は鼻の入り口に貼り付けて使用します。絶対に中に押し込まないようにしてください。取り出せなくなる危険があります。
Use this product by pasting it at the entrance of the nose. Never push it in. There is a risk that it cannot be removed.
道具/Tools
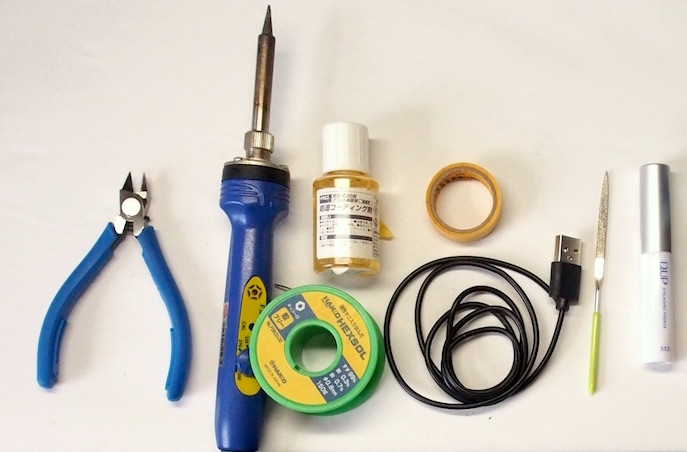
精密ニッパー/半田ごて/防湿コート/マスキングテープ/ヤスリ/5V電源/つけまつげ用の糊/エタノール(掃除用)/綿棒/バイス(できれば)/ピンセット(できれば)/ラジペン(できれば)
small nipper / soldering iron / conformal coating / masking tape / file / 5V power supply/glue for eyelashes / ethanol(for cleaning)/cotton swabs/ vice (optional)/tweezers (optional)/Radio pliers(optional)
内容物/Contents
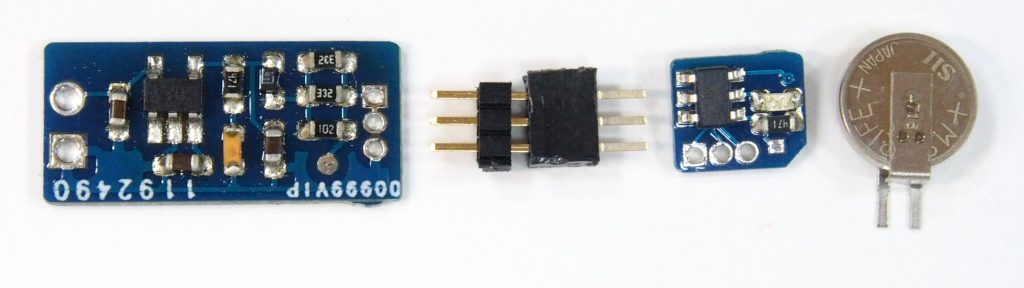
充電基板/コネクタ(オス&メス)/鼻ホタル/電池
Chager board / connector (make & female) / Nose Led /Battery
Step1.ヤスリがけ/filing

メスコネクタの角をヤスリで落とします。軽くヤスリがけするだけで十分です。
file the female connector to remove sharp edge.Just little bit is enough.
Step2.電池端子加工/Form battery terminals
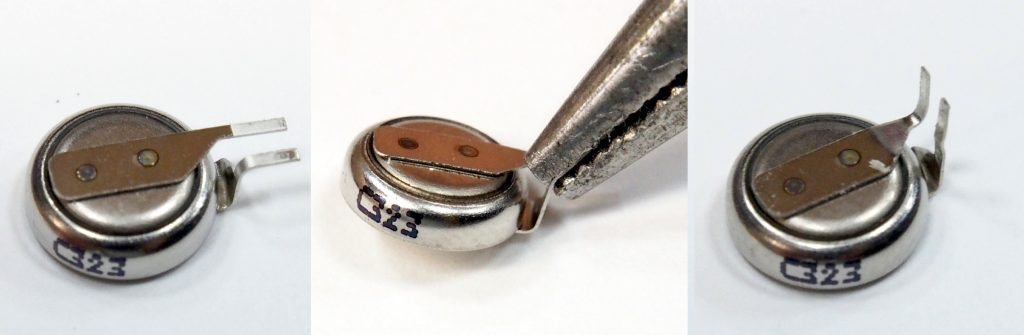
二つの端子をショートさせないように気をつけながら、右図のように端子形状を整えます。
Form the battery terminals as shown on the right. Take care to avoid short circuits.
FYI:作業中のショートを防ぐために電池をマスキングテープで包むと良いでしょう。
FYI:To avoid short circuit. Wrapping with masking tape is good idea.
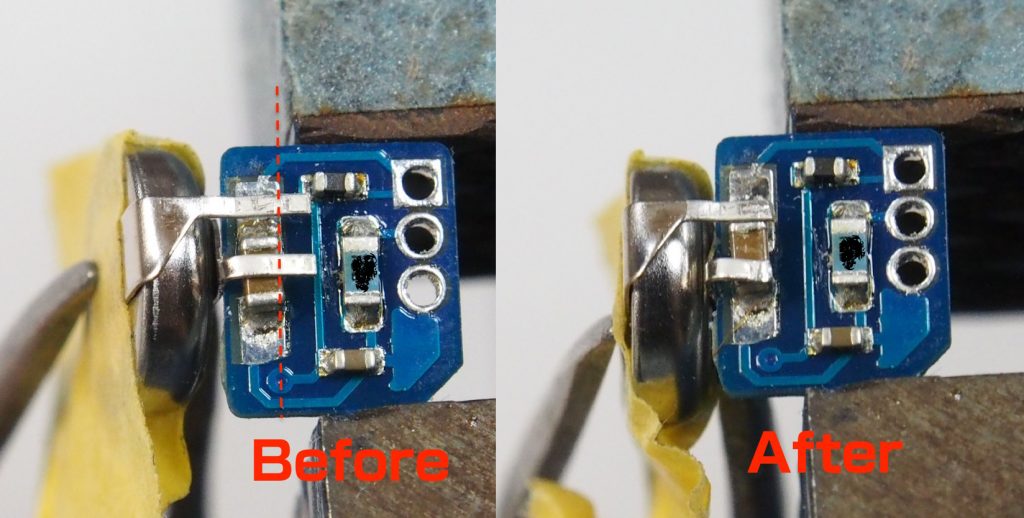
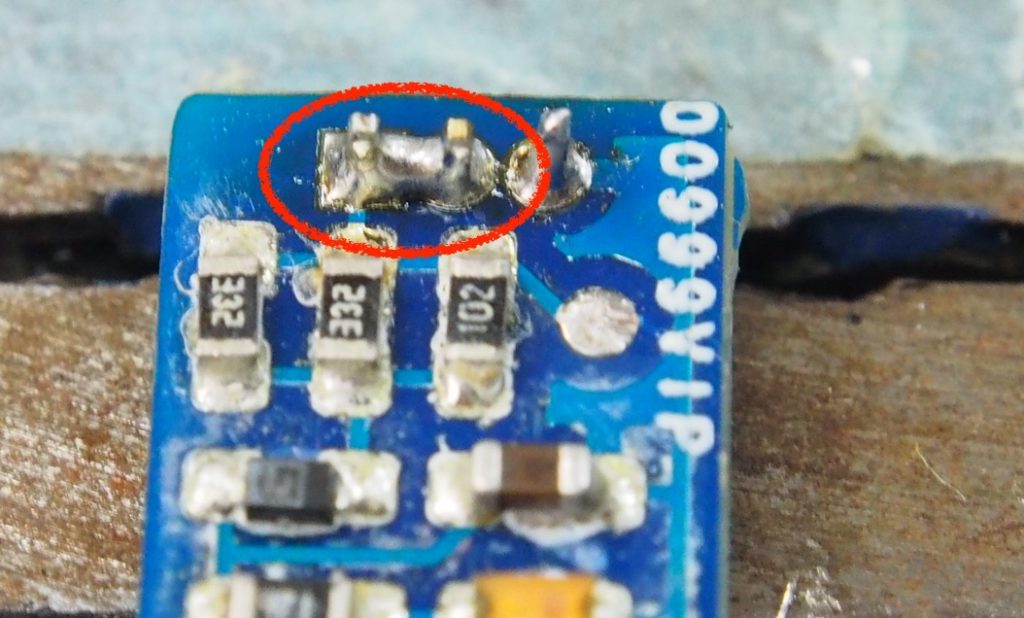
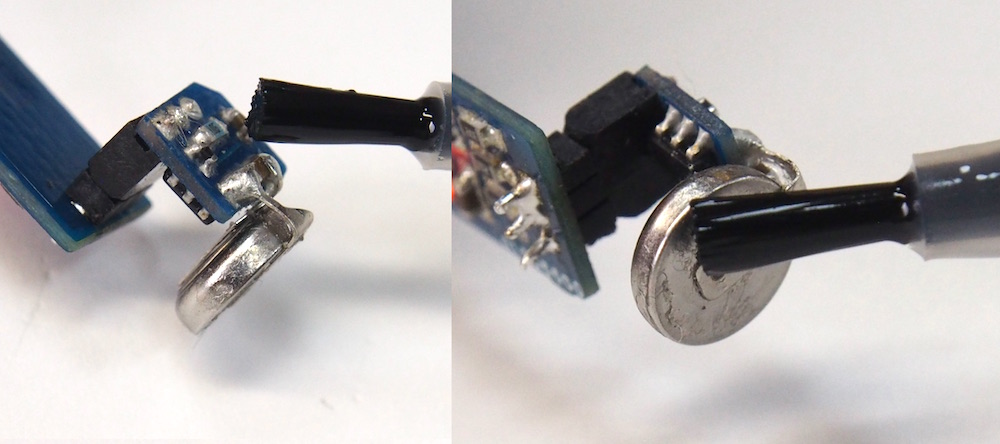
そのままでは電池端子はちょっと長すぎます。鼻ホタル基板コンデンサ側にあてて、はみ出した部分の赤点線の位置でカットします。
The battery terminals are a little too long. Cut to the capacitor side ( position of the red dotted line ).
Step3.コネクタ半田付け/Soldering connectors
鼻ホタル基板にメスコネクタを半田付けします。Solder female connector Nose LED(hanahotaru) board.
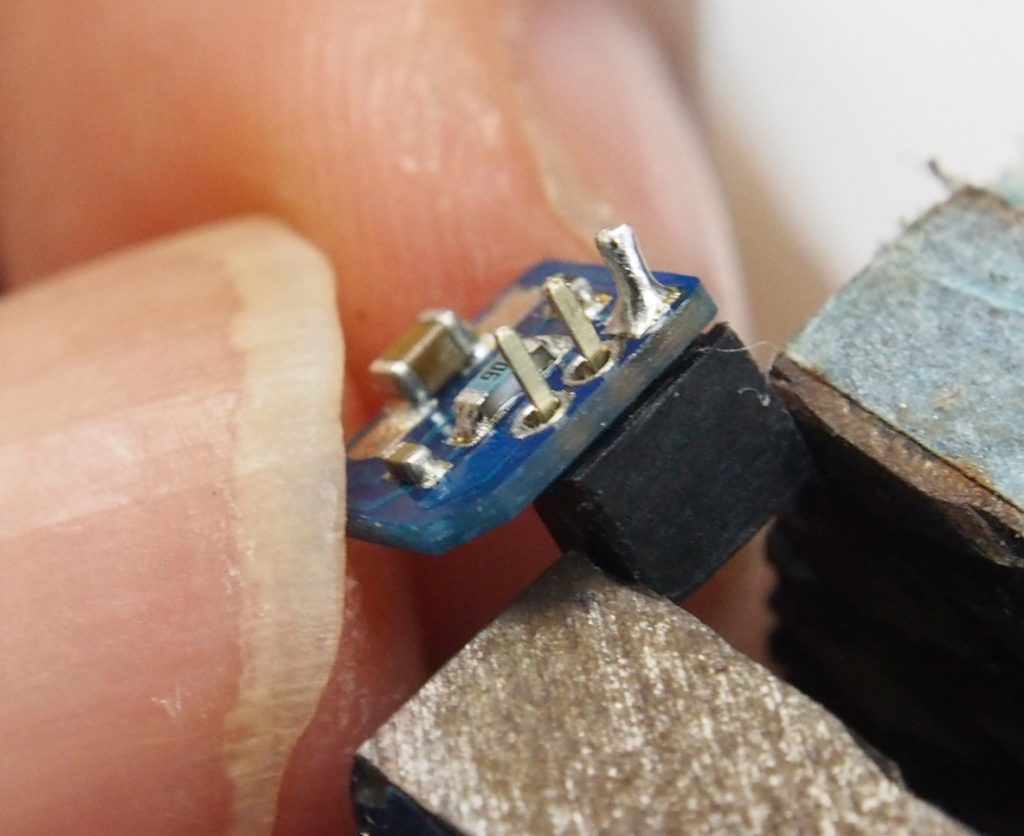
1つだけピンを半田付けして、垂直にコネクタが付いている事を確認します。Solder only one pin and make sure that the connector is attached vertically.

残りの2ピンを基板表面にあわせてカットします。
Cut the remaining 2 pins along the board surface.
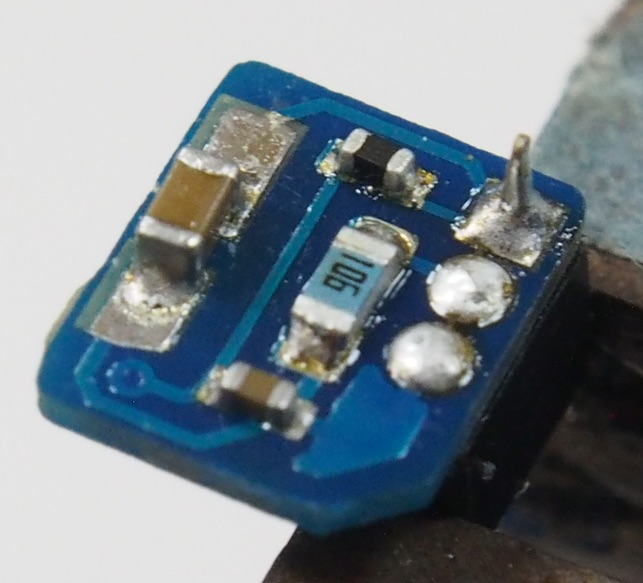
その2ピンを半田付けします。Solder the 2pins.
最初の1ピンをカットして、再度半田付けします。Cut the fist pin and re-solder it.
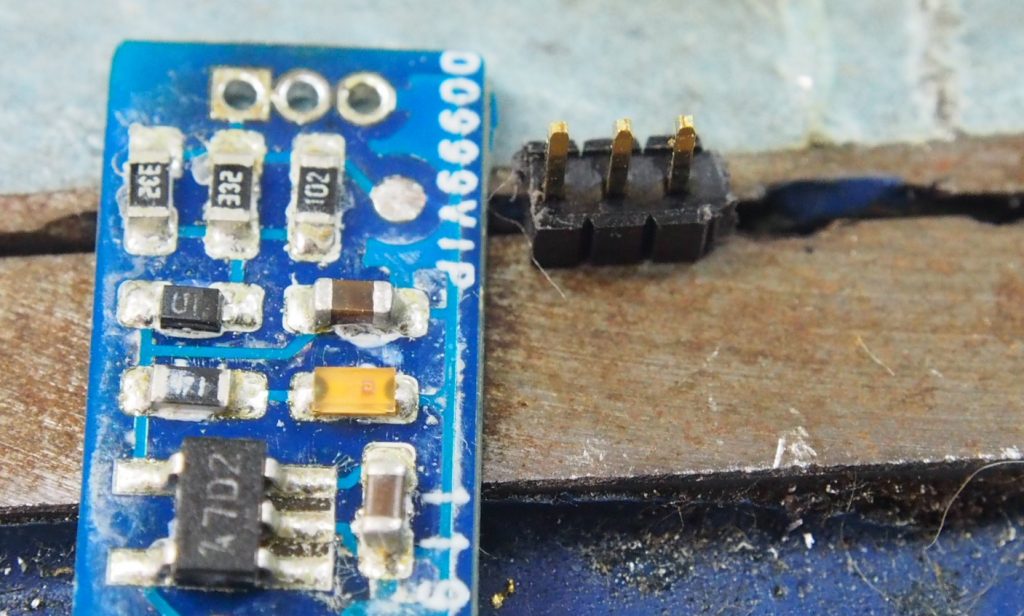
充電器へオスコネクタを半田付け。注意:オスコネクタのピンが短い方が半田付けする側です。
Solder male connector to the charger.Note: The shorter pin of the male connector is the soldering side.
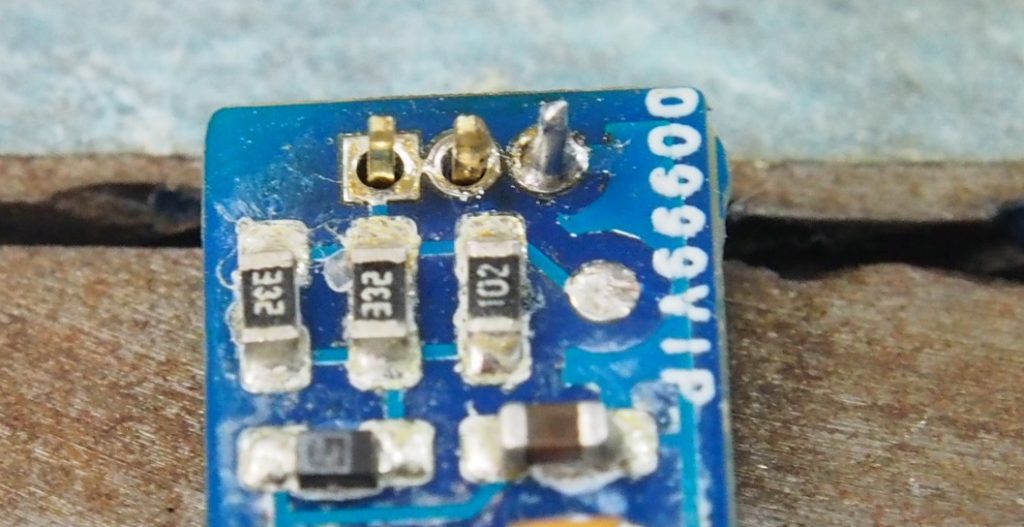
まず右側のピンを半田付けして、垂直を確認します。At first, solder the right side pin and check the vertical.
のこり2ピンを半田付けします。この2ピンは半田ブリッジしても問題ありません。Solder remaining 2pins.This will make solder bridge but no problem.

5V電源を繋ぎます。USBでOKです。プラス側に+刻印があります、刻印がないほうにGNDを繋いで下さい。 Solder 5V power supply,USB is OK. Plus mark on the board means plus 5V another is GND.
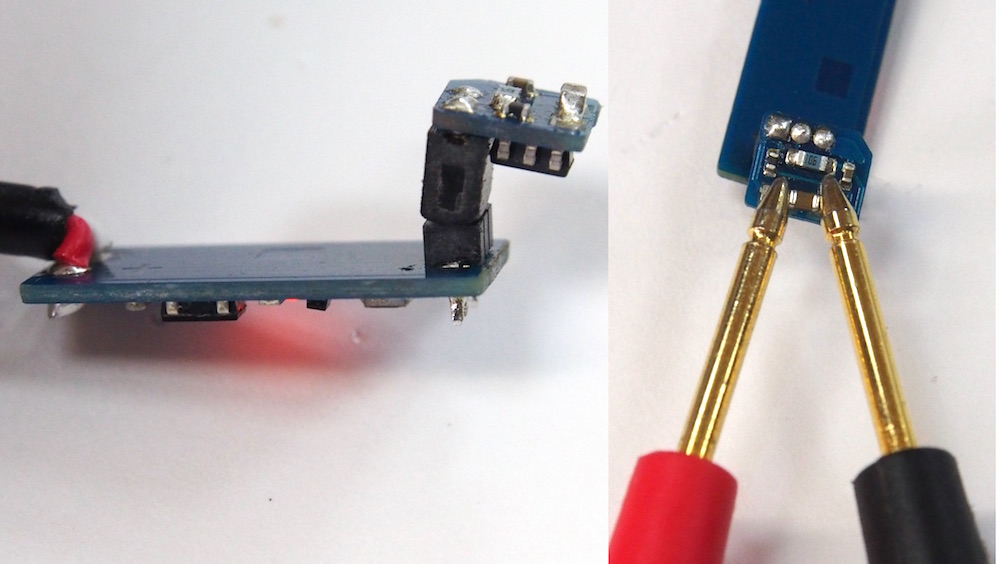
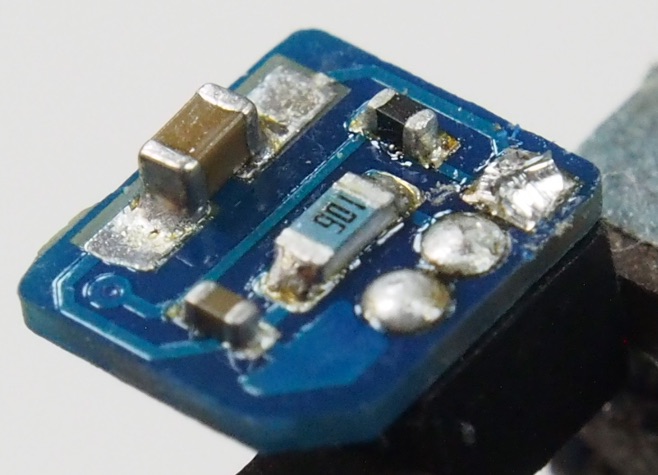
(オプショナル)電圧を確認します。コネクタを図のようにつないで、コンデンサ(茶色の部品)の電圧が3.2V程度である事を確認します。
(Optional) Check the voltage. Connect the Nose LED like the figure and check the voltage of the capacitor (brown part) voltage.The voltage must be about 3.2V .
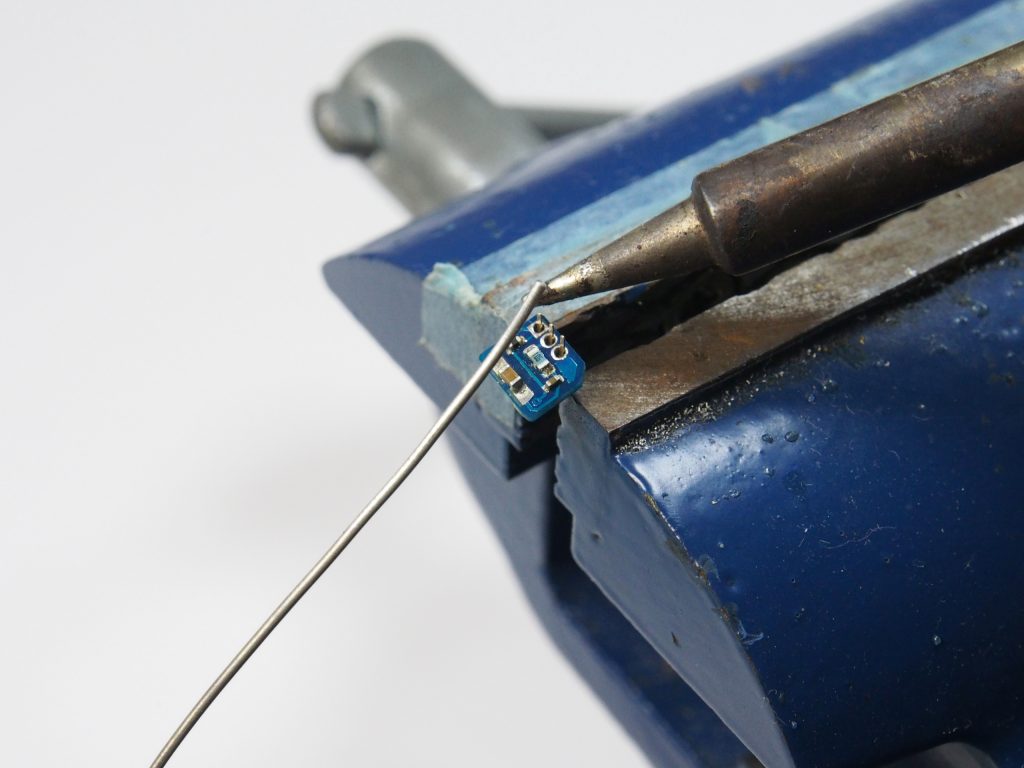
Step4.電池半田付け/Solder the battery
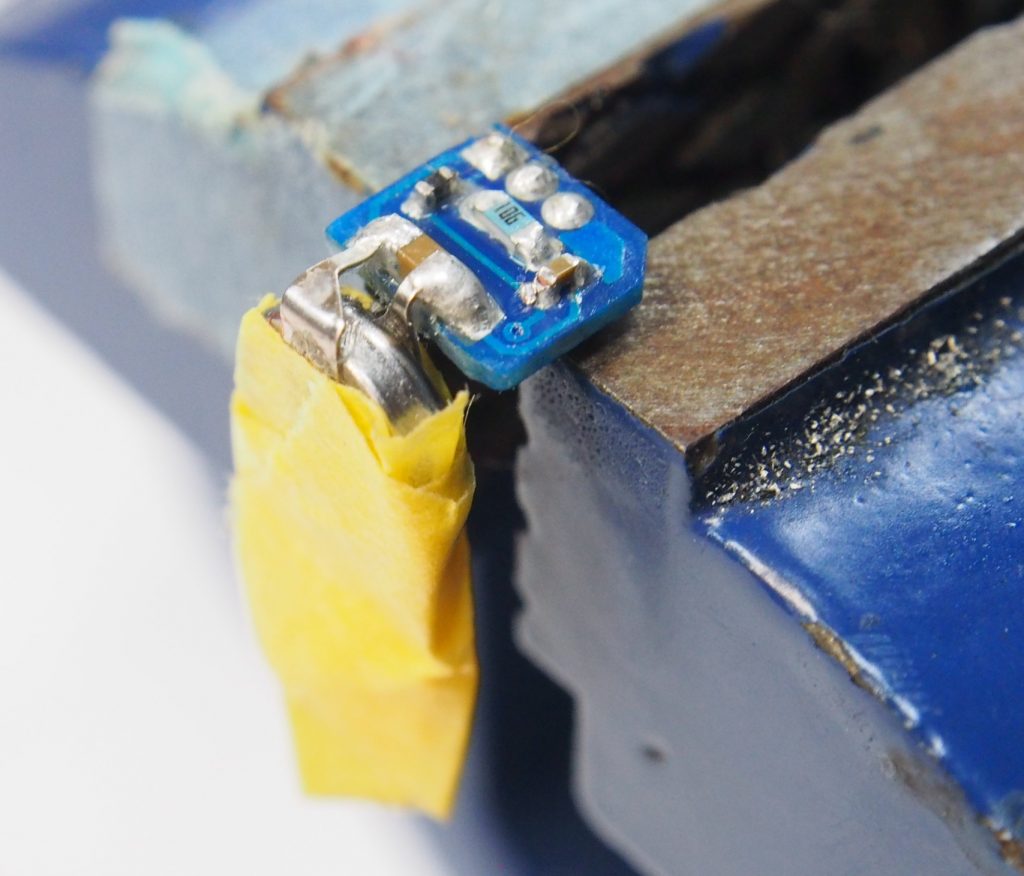
電池を半田付けします。ショートに注意。Solder the battery.Be careful to avoid short circuit.
Step5.清掃/Clean up
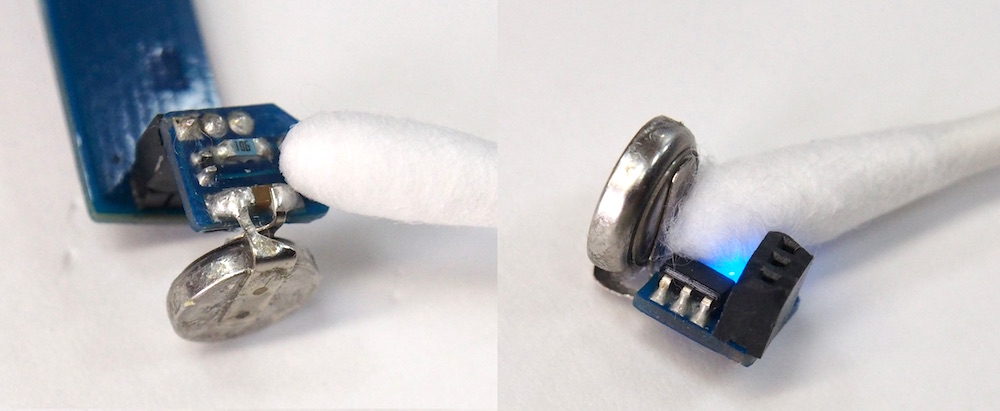
綿棒とエタノールで鼻ホタル基板を清掃します。Clean up the Nose LED board with cotton swabs and ethanol.
Step6. コーティング/Coating
鼻ホタル基板の両面と、電池をコートします。コネクタにはコート剤を塗らないように注意してください。私は基板コート剤を使っていますが、エポキシ接着剤等を「薄く」塗っても良いです。
Coat both sides of Nose LED board and battery. Be careful not to coat the connector.I use conformal coating, but you can also use epoxy adhesive.(Apply “thinly” )
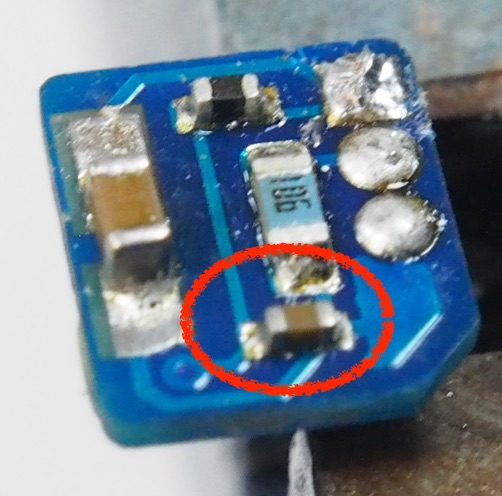
注意:鼻息検出用の温度センサがこの赤丸の位置にあります。接着剤等でコーティングする場合は、この部分を薄くコーティングするようにしてください。
Note: The temperature sensor for detecting nasal breathing is located at the red circle. When coating with adhesive, etc., please coat this part thinly.
おしまい!/Finish!
組立は終了です。おめでとうございます。使わない時でも4ヶ月に一度、8時間程度充電を行って下さい。congratulations! Assembly is complete. Even when not in use, please charge about 8 hours every 4 months.
つかいかた/How to use
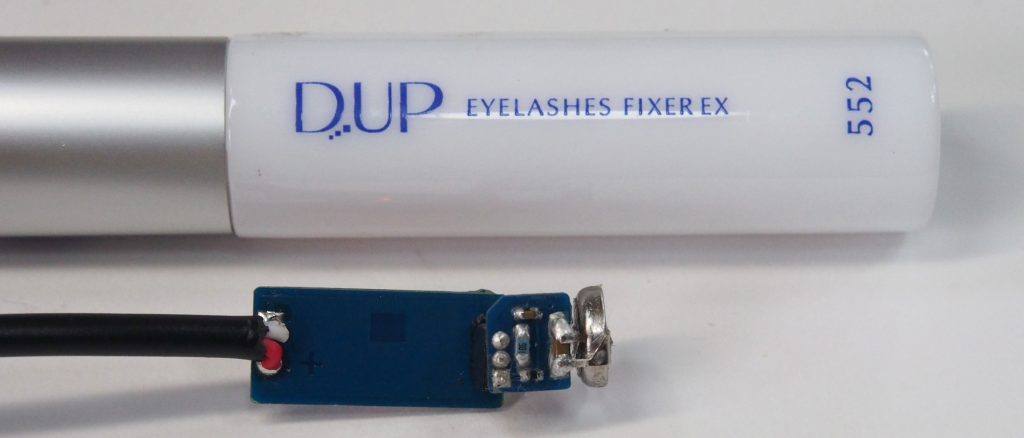
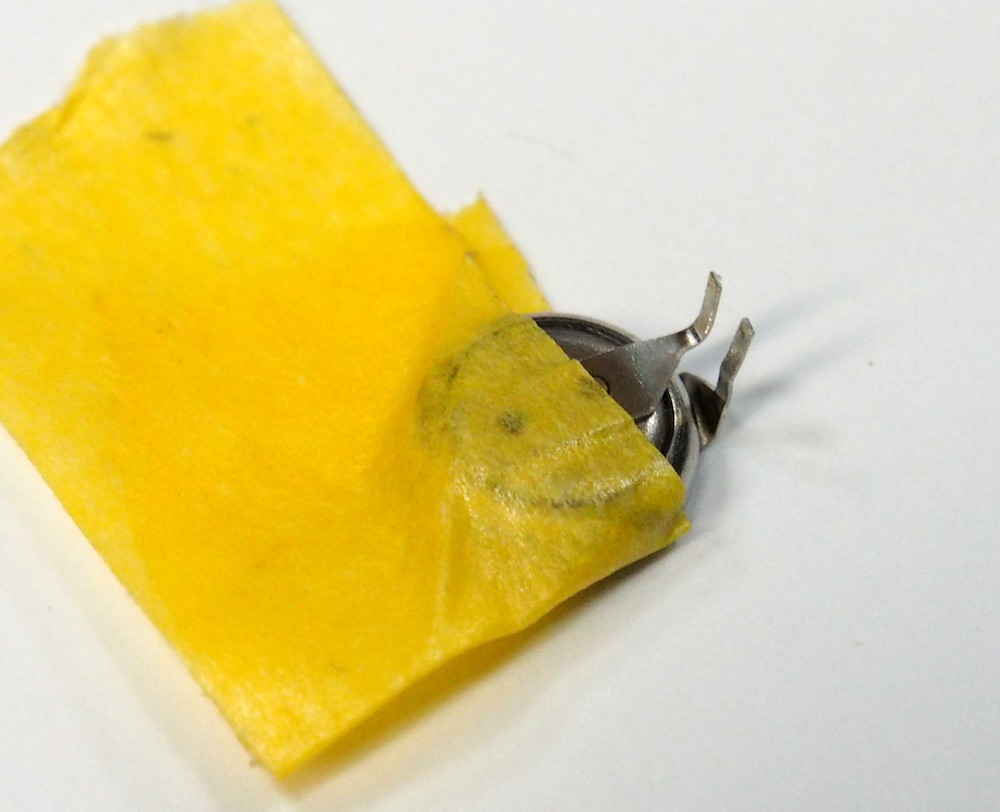
鼻ホタルはつけまつげ用の糊で固定します。The Nose LED is fixed with glue for eyelashes.

糊を電池に塗ります。塗った後しばらく待つ必要があります。詳しくは糊の説明書をお読み下さい。Apply glue to the battery.It is necessary to wait for a while after applying. Please read the glue manual for details.

鼻の入り口に電池を下にして鼻ホタルを貼り付けます。鼻の中に押し込まないで下さい。取り出すときは指でつまんで取り出します。取り出せない時は鼻息で吹き飛ばす様にして取り出します。絶対に鼻をほじらないでください、奥に入り込んでしまいます。
Attach the Nose LED with the battery facing down at the nose entrance. Do not push it into your nose. When removing, hold it with your fingers. If you can’t take it out, blow it away with nose breath. Never dig your nose, Nose LED will get into deeper.
充電/Charge
以下の図の向きに充電器にセットしてください。逆向きに接続すると電池が過放電し、使えなくなります。過放電時はMS621電池を交換してください(秋月電子で入手可能)。
Set the battery charger in the direction shown below. Connecting the battery in the opposite direction will cause the battery to over discharge and become unusable. Replace the MS621 battery in case of overdischarge (available from Akizuki Denshi).
鼻ホタルは約3Vで動作します。電圧の測定は鼻ホタルを充電器にセットして、コネクタのはんだ付け部分で測定してください。
The nose LED works at about 3V. To measure the voltage, set the nose firefly on the charger and measure it at the soldered part of the connector.

強制リセット/Force Reset
電圧が十分にあるにも関わらず、鼻ホタルが動作しない場合は湿気による漏電の影響でマイコンが暴走している可能性があります。よく乾かした上で、充電コネクタのハンダ面を0.1秒程度ショートさせてマイコンにリセットをかけてください。
If the Nose LED does not work even though the voltage is sufficient, the microcomputer may be out of control due to the leakage current of moisture. After thoroughly drying, reset the microcomputer by shorting the soldering surface of the charging connector for about 0.1 seconds.
技術情報/Technical information
技術情報については以下URLをご覧ください。Please see this URL for more technical information.
https://akirayou.net/wp/2019/noseled-tech/
質問/Any question?
お問い合わせはyou.akira.noda@gmail.comまで。
Please contact at you.akira.noda@gmail.com